Sunday, June 29, 2014

Peach and Granola Yogurt

This week's breakfast is a delightful treat of fresh Georgia peaches, granola and Chobani Greek yogurt.

One bowl includes 1/2 c Chobani Greek yogurt, 1/8 tsp vanilla extract, 1/4 tsp local honey, 1/3 c cranberry almond granola and 1/2 medium peach sliced.

I stirred the vanilla and honey into the yogurt prior to adding the peach and granola.

The dish is delicious, but I was a bit frustrated by slicing the peach.  The flesh wouldn't turn loose from the pit. I finally just cut the slices I had made off the pit. Anyway, that seems to be the only downside to this dish.

Bon appetite!

Saturday, June 28, 2014

Berry Pecan Salad


Tonight's creation began as a Raspberry Pecan Salad and quickly evolved to a Berry Pecan Salad when I saw the price of raspberries at the farmer's market.  No worries though, the substitute berries I chose are still antioxidant - rich.

To re-create the plate shown above, you'll want two handfuls of the Organic Girl "I love baby kale" greens, 1/4 c blueberries,  4 sliced strawberries, 3 sliced button mushrooms, 1/2 avocado sliced and 1/4 c mixed unsalted nuts.

For dressing, I drizzled extra light olive oil, red wine vinegar and balsamic vinegar on top.

This was delicious and easy to make.  Enjoy!


Tuesday, December 3, 2013

Southeast Meets Western Frontier: Marmalade Muffins

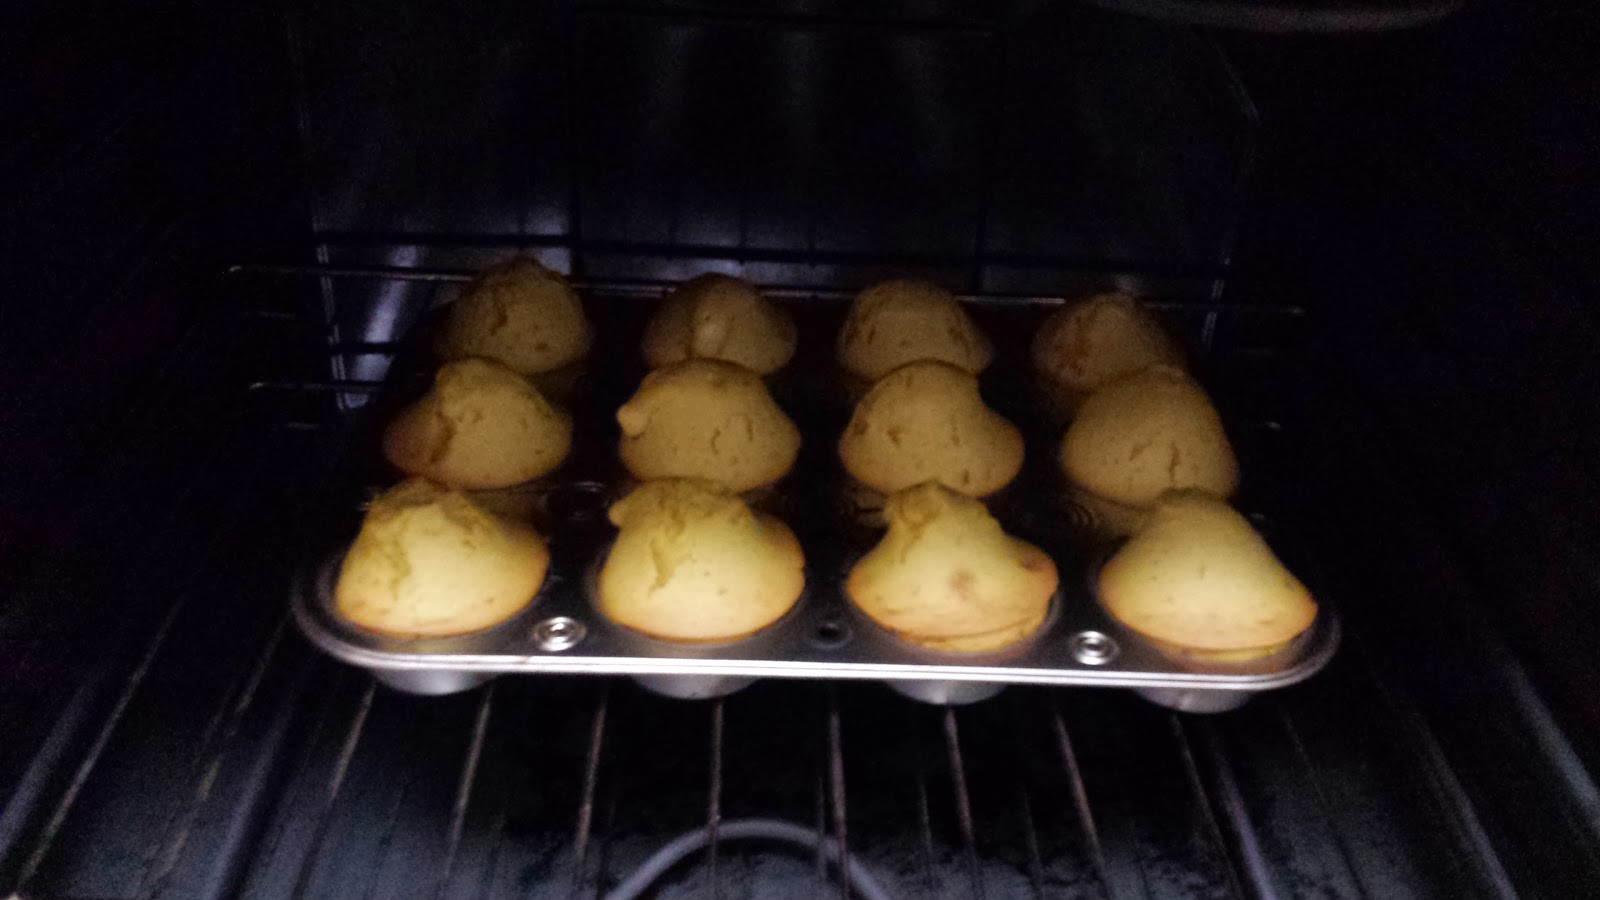
What to do after driving five hours? Prep your work meals for the week of course.  I took the easy way out for lunches, but for breakfast, I simplified Ree's Marmalade Muffin recipe. As always, feel free to follow the original recipe, but here's how I did it.  I didn't want to make the glaze so I added the brown sugar to the muffins instead and reduced the amount of granulated sugar used.

Preheat oven at 375 degrees Fahrenheit.

Combine the following in a medium size mixing bowl:

0.5 cup granulated sugar (1 c if you like it sweet)
1 cup brown sugar
2 large eggs
1.5 cups almond milk (unsweetened)
0.5 cup olive oil
2 cups all purpose flour
1 teaspoon apple cider vinegar
1 teaspoon baking soda
and zest from 2 oranges

Mix on low until batter is smooth.


Use a regular 12 spot cupcake pan. Spray with Pam nonstick spray.  Add 0.5 cup batter to each. Bake for approximately 30 minutes. This part is tough to judge so be sure to use a toothpick to judge.  If any batter or crumbs stick to the toothpick,  bake a little longer.


The good news is that the finished product is absolutely delicious with morning coffee. Your home will also smell like a fresh orange and that's always a plus.


Enjoy!

But before you jump right in, be careful of the orange zesting. It's not a good time to have a loose grip...


Wednesday, August 29, 2012

Southeast Meets Western Frontier: Fancy Mac & Cheese

I played with Ree's Fancy Mac and Cheese recipe to add a little bit of green and a carb-less noodle option.  This was important to me for a couple of reasons:
  1. This recipe already has five cheeses... there had to be some health considerations somewhere
  2. Green is important- embrace it and hide it in cheese
  3. As we all stave off diabetes or try to control it, a Pasta Zero option is a good idea
Step One:  Shop
 
The ingredients needed for this recipe are:
  • 1 package of sliced turkey bacon
  • 2 yellow onions, diced
  • 2 broccoli florets
  • 16 oz. mushrooms, sliced
  • 3 packages of shiritaki Pasta Zero
  • 1/2 cup Parmesan, grated
  • 1/2 cup Gruyere, grated
  • 4 oz. Goat Cheese, crumbled
  • 4 oz. Blue Cheese, crumbled
  • 2 eggs, beaten
  • 2.5 cups cream
  • 1/4 cup all-purpose flour
  • 1 stick of butter
  •  
Step Two:  Grate Cheese
 
I'm impatient so grating cheese is clearly the hardest part of this recipe to me.  Meanwhile, I had my broccoli steaming in a pot, my sliced mushrooms and diced onions sauteeing and my bacon sizzling on the George Foreman Grill.  Luckily, the shiritaki Pasta Zero comes in a liquid so this won't need boiling.  I would recommend rinsing it well and then tossing with a lemon or lime's worth of juice before using in any recipe.
 
Step Three:  Sauce It Up
 
In a medium sauce pan, I melted 4 tablespoons of butter, whisked in 1/4 cup flour and continued whisk when adding the 2.5 cups of cream.  I added approximately 1 teaspoon of salt and pepper each.  I used a little less than 1/3 cup of this heated sauce into my beaten eggs to temper them to the heat and then added them slowly to the sauce.
 
Step Four:  Then Add Cheese
 
This was the time to get excited because I mixed all the grated cheeses (EXCEPT the Blue Cheese) and added them to the sauce pan.  I stirred constantly until there was a nice melted sauce. 
 
Step Five:  Mix Pasta Zero, Broccoli and Cheese Sauce
 
I used the melted cheese sauce to pour over the steamed broccoli and Pasta Zero.  I mixed this gently so as not to mush the broccoli or make a knot of the pasta.
 
Step Six:  Layer
 
Now it was time to layer the ingredients into a buttered cooking dish.  Start by layering (in order):  half the onions, half the pasta/broccoli mix, half the mushrooms, half the blue cheese and half the bacon.  Then repeat this layering process a second time.
 
Step Seven:  Bake

I baked this dish at 425 deg F for 25 minutes.  Use a bigger baking dish than me... mine ranneth over.

Step Eight:  Enjoy
 
This was a delicious recipe.  Would it have been tastier without the broccoli and fake pasta?  Yes, of course it would, BUT this way, we got the cheese and didn't have to feel nearly as guilty about it. 
 
423 cal/ 8 g carbs/ 37 g fat/ 14 g protein per serving
 
**Notes**
  1. Be sure to use a larger baking dish than I did.  Mine bubbled over in the oven.
  2. In the future, I'll cut the Pasta Zero before adding to a dish.  It was slightly stretchy.  I've heard gluten free pasta is a spoungier texture, but it takes forever to wind it around a fork.
  3. The mushrooms and the onions really add the flavor to this dish.  They compliment the cheeses quite nicely.

Monday, August 27, 2012

Southeast Meets Western Frontier: Pineapple Black Bean Quesadillas

Ree's Barbecue Chicken and Pineapple Quesdillas were the inspiration/original goal of this recipe.  Since I avoid high fructose corn syrup, I bought an 'All Natural' barbecue sauce... It smelled fine, looked fine, but after grilling the chicken with it, it was not fine.  I chucked the chicken in the trash... this pained me because I don't like to be wasteful, but I just couldn't bring myself to eat it.  Luckily, I had a can of black beans in the pantry, and those quickly became the heroes of this recipe.
 
Step One:  Choose a Ripe Pineapple
Pluck a pineapple leaf to check for ripeness.
 
To select a ripe pineapple, choose the fruit whose top leaves pull out easily.  This trick has always worked for me.  Besides a pineapple, you will also need the following:
  • 12 small tortillas
  • 1 jalapeno, sliced
  • 1.5 cups grated Monterey Jack cheese
  • Sour cream for serving
  • 15 oz. can black beans, rinsed and drained
  •  
Step Two:  Peel Ripe Pineapple
Slice off the outside peel.

I slice the bottom from the pineapple first; this gives me a flat surface to sit the fruit.  Next, I rotated the fruit slicing down each side and removing the outer peel.  Finally, I'll slice off the top of the pineapple.

Step Three:  Chop Ripe Pineapple
Cut around the core

The pineapple has a core so I then slice the fruit from around the core.  Those fruit wedges can then be chopped into smaller pieces.  I sliced mine to quarter inch slices and grilled them.  It's likely easier to grill the wedges prior to slicing them smaller.

Step Four:  Assemble Quesadillas
Lots of pineapple is key!

After grilling the pineapple, I assembled the quesadillas on my George Foreman grill.  I layered black beans, pineapple, jalapeno and cheese before placing the top tortilla.  I let each grill until the cheese was melted (~6 minutes).

Step Five:  Store
Store in aluminum foil...
 
I stored these in aluminum foil in the freezer.  The re-heating process was a little too long for my general impatience.  I had to defrost 4 minutes and then heat 2 minutes.  I served them with sour cream.  Enjoy!
 
395 cal/ 46 g carbs/ 17 g fat/ 14 g protein per quesadilla and 4 tbsp sour cream
 
**Notes**
  1. I used corn tortillas, but these crumble too easily.  Perhaps the flour tortillas would be a better choice?
  2. Always taste your individual ingredients prior to combining them.  I would have been sorely disappointed if I had used the chicken I disliked. 
  3. If you haven't had grilled pineapple before, you are in for a treat!  It's delicious.
  4. I stored these for a week in the freezer, but I'm afraid I tasted a little freezer burn by day 4 so be careful.


Friday, August 24, 2012

Southeast Meets Western Frontier: Sweet Lime Pickles

Ree's Sweet Lime Pickles are unavailable online BUT I've revised her recipe to a low sugar and easy canning option.  All you need is five pounds of cucumbers, 10 pint jars and a big pot.  You might also want to muster up some "Want To," too because it's a two day adventure.

Step One:  Slice and Soak
Pickling Lime = Crispy Pickles!

Purchase 5 pounds of pickling cucumbers (or make friends with someone with an ample garden).  Select the cucumbers that are firm and mid-size.  Don't get the large ones (not so tasty) and if they still have fuzzy pricklies, they're too small/unripe.  Rinse these and slice them.  Place the slices in a large pot along with one package of Mrs. Wages Pickling Lime (easily found at WalMart along with all the canning supplies).  Mix the pickling lime with 8 cups of water and pour over the cucumber slices.  Stir.  Put a lid on the pot and refrigerate overnight.

Step Two:  Soak Some More ... and then Boil
Pickles in the making

On the following day, remove the cucumber and rinse them thoroughly.  Wash this pot if you'll be using it to prep the canning mix.  Add the rinsed cucumber into the freshly cleaned pot along with 8 cups of white distilled vinegar, 4 cups of sugar (you can add more but I like 'tangy' pickles), 2 tablespoons of pickling spice (found on the canning aisle), 1 teaspoon turmeric, 1 teaspoon salt and 0.5 teaspoon of cayenne pepper.  Heat briefly (do not boil; 10 minutes at medium-high heat).  Remove from heat, cover with a lid and refrigerate for 4 hours.  Finally, bring the pickles to a boil for 45 minutes (occasionally stirring). 

 Step Three:  Can  ...(yes, you can)

I don't use a canner.  I do, however, place my jars in the dishwasher first so they'll be nice and clean/hot before adding my boiling mix of pickles.  Lightly boil the "lids," too.  Remove the pint jar from the dishwasher, insert funnel, fill with pickle slices (try to fit as many as possible), and then pour in the pickling liquid to cover the pickle slices.  Wipe off the jar mouth thoroughly, dry a lid from the boiling lids pot, place the lid on the jar mouth and tighten a ring over the lid.  Sit in a low traffic area and do not disturb for 24 hours.  If successful, you'll be hearing little sealing "pops" all evening. 

53 cal/ 13 g carbs/ 0 g fat/ 0 g protein per 5 slices

**Notes** 
  1. These are the best pickles I've ever had (homemade).  I'll always be partial to the Dill Pickles from the grocery store BUT these are the best homemade I've had. 
  2. I hesitated when I first saw this recipe because I always think of the Andy Griffith Show - Pickle Story.  If you haven't seen it, take the 25 minutes and laugh.  Basically, Aunt Bee thinks she can pickle cucumbers successfully, but their taste is lovingly described as like "kerosene". 
  3. Be adventurous- try pickling!  :)

Wednesday, August 22, 2012

Southeast Meets Western Frontier: 'Pork' Tortilla Soup

I took a few liberties with Ree's Chicken Tortilla Soup and turned it into my Pork Chop Tortilla Soup.  I hope you don't mind... It's just as tasty if not more so... because after all, it has leftover pork chops and the original pork chop drippings/broth. 

Step One:  Clean Out the Fridge
Ingredients... I know- I cheated by using canned black beans.

I used the following ingredients:
  • 5 leftover pork chops, cooked and cubed
  • 4 green onions, chopped
  • 2 tomatoes, diced (with juice)
  • 1/2 green bell pepper
  • 1/2 red bell pepper
  • 1 jalapeno, diced
  • 1 16 oz. can black beans
  • 3 garlic cloves, diced
  • 6 small corn tortillas, cut into strips
  • 1 teaspoon ground cumin
  • 1.5-2 cups pork chop broth (use a chicken broth if you don't have this)
  • Sea salt and Chef's black pepper to taste
  • 1-2 cups water

 Step Two: Combine Ingredients in Pot
Cooking up some flavorful yummy

This is a VERY flavorful soup AND very filling for a lunch.  This is also SUPER easy to prep.  I originally prepped my pork chops in a Dutch oven with 3 cups water (1 hour at 350 deg F, bake).  This will give you the pork chops and the broth for the soup.  Season the pork chops as your palate dictates.  Dice these chops and add to your soup pot along with the broth.  Next, add you diced vegetables and seasoning.  Dilute this mix with water right up to the ingredient surface.  Finally, add your tortilla strips and stir.  Cook this on medium high heat for ~40 minutes.
279 cal/ 22 g carbs/ 6 g fat/ 32 g protein per 2 cup serving

**Notes**
  1. I stored this soup for one week.  Re-heating at lunch for two minutes (microwave).  Yes, it maintained its yumminess throughout the week.
  2. Be forewarned that the tortilla strips will dissolve slightly and 'cloud' the soup.  No worries, though, still tasty.  If this bothers you, however, just add the strips before microwaving to reheat.